Showing posts with label crafts. Show all posts

Friday, November 9, 2012

Friday DIY - Free People Inspired Double Pom Pom Beanie

hey wow...it has been a long time since i did a friday DIY.  if you have followed me for a while you know i love the free people brand, however, cannot afford the Free People brand. 
therefore, i am left to make the things i like myself.
today i bring you the Free People inspired Double Pom Pom Beanie.
how cute is that!? it looks like little fluffy ears.  Click here for the original
double pom poms across the sky...err sorry getting carried away.
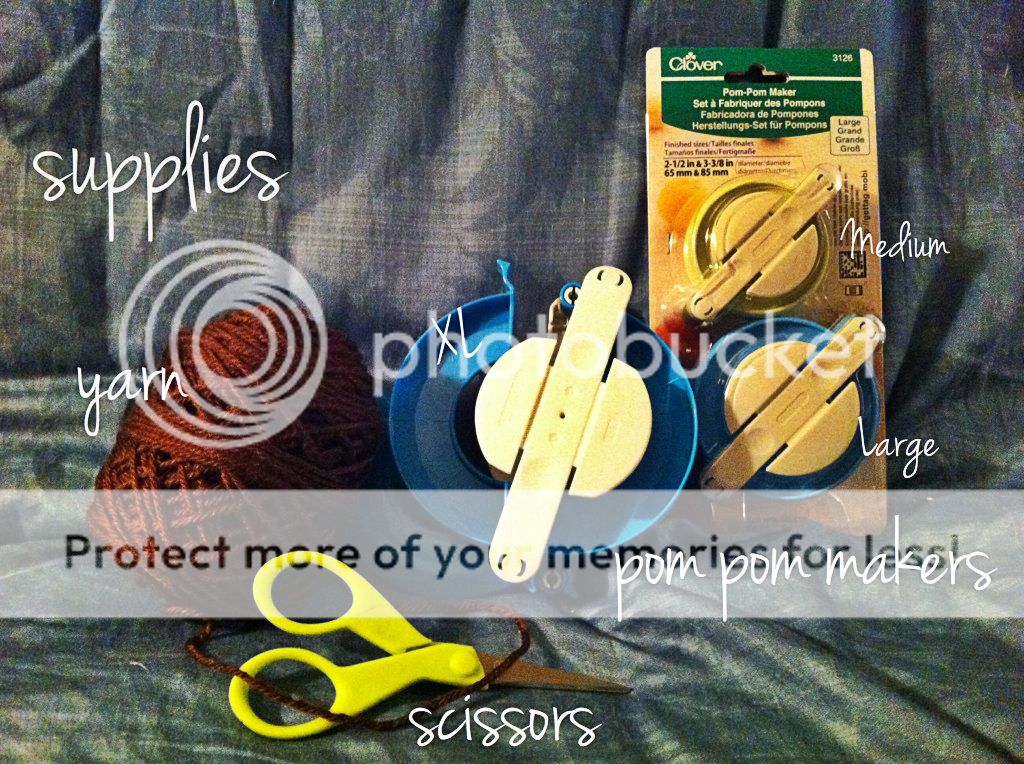
Supplies:  Pom Pom makers (I prefer Clover brand found here or at local hobby stores), yarn, scissors, and a premade beanie (not pictured)

You can use any beanie you have laying around or you can make one (patterns for crochet and knitted).

Step 1 - Make your pom poms with a yarn that matches your beanie...or not.  I didnt photograph this step because depending on your pom pom maker it will be different....just follow the directions on the package. i used the XL for mine - size is up to you
Step 2 - When you tie off your pom poms be sure to leave your tails long (about 6-8inches)
Step 3 - poke your tails through the top of the beanie...you may need to use a crochet hook or yarn needle to get it through the knit.  my beanie was pretty loosely knit so i could just pick the tails through with my fingers.  your tails should now be on the inside of the beanie. 
the spacing is up to you!
Step 4 - Tie your tails together or secure to the beanie in some way.  if you knot them together they are only pulling on each other, not the knit of your beanie.  In the picture below you can see i tied the tails into a bow.....that way i can take them off whenever i dont want them there.
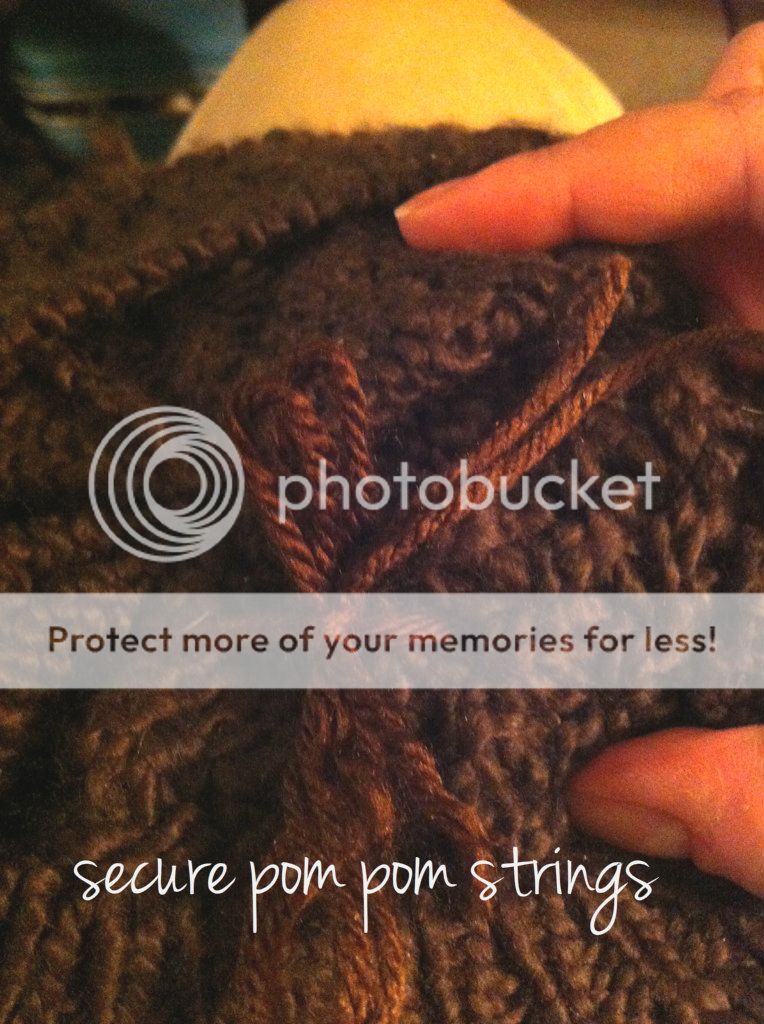
Step 5 - adjust as needed.  Do you need to move them forward or backwards on the hat?  Move them closer together or further apart?  You decide.

I know this tutorial has been alittle slap-dash, but i wanted to show you something cute that can you can do quick over the weekend. 
 A few suggestions:
→Use a snug fitting beanie...the one i used here is very loose and floppy...not as awesome as it could be
→Make your pom poms as full as possible.  The XL pom pom maker that I used takes forever to fill up....and lots of yarn!!  I got impatient so they arent as full as i'd like. 
→Another tip that my mom taught me is to use waxed dental floss to tie them up with (the knot wont slip as easily) you can always tie a yarn tail to it before you take the pom maker apart.

Enjoy!!  I would love to see how yours comes out.

Thursday, January 12, 2012

Pin-tastic finds

i jumped on the pinterest train about 6 months ago....and im hooked. 
i have heard it called "crack for the crafy woman" and it really and truly is.  i cant tell you how many patterns, DIY ideas, recipes, etc i have collected.
you can find and follow me here <-- shameless plug for followers

so i decided to start a new series of posts based on my favorite pins of the week
 hooked....if you check out my boards you will see that there are hundreds more where that came from.  if you dont already have pinterest leave me a comment with your email and i can send you an invitation....i think thats how it works.


Friday, July 29, 2011

i heart friday!

here are some of my favorite interwebz finds from this week
1. This amazing embroidered portrait by Daniel Kornrumpf via Craftzine Blog


2. This awesome Art Nouveau inspired Amy Pond and the TARDIS artwork...pure excellence! i want a copy....anyone know where i can get a copy.....nevermind i found it here .  The artist is Bill Mudron who has done work for Disney and a bunch of other cool companies

3. This super neat handmade version of the American flag....from Free People ....i might have to make myself one to hang in my house somewhere

4.  This absolutely adorable Lady Fox Brooch by Hanaletters

5. This hand screened Navajo print scarf from Thief and Bandit.  Their store is really neat and full of comfy hand screen printed jersey knit products.  I do alot of hand screenprinting myself so i appreciate their stuff and the time they put into making it.

6. ive been following the blog "Easy makes me happy" for a while mainly because i love her crochet patterns available in her etsy shop ...i want this slipper pattern.  go check out the rest of her patterns which include a viking helmet crochet pattern for kids to adults...it's awesome!

7. this leather feather headband made from reclaimed leather....also by Thief and Bandit
I may attempt to make one similar but paint it to look like a pheasant feather


8. &9. these two necklaces from Shlomitofir ...they are so delicate and beautiful.  i dont like wearing really busy necklaces....mainly because my hair gets tangled in it, but also because i like to keep things simple.  She has so many other beautiful things in her etsy shop....many are on sale right now!!

i wont put a number 10 because this post is long enough already.  have a great weekend!!


Wednesday, July 20, 2011

How to stay CREATIVE!!!

(source)
saw this online today and felt it was necessary.....mainly for me, but maybe it will help you stay creative and inspired.
what have you been working on lately?

Tuesday, July 5, 2011

crafty crafty : crocheted peter pan slippers

i poke around several craft blogs on a regular basis....i like to see what is out there and get inspiration for new projects or gifts to make.  one of those crafy blogs is Craftzine .  while perusing the crochet area of the blog i found this super cute pattern for peter pan slippers that can be made for infant-adult sized feets.  its not a free pattern but it will only set you back $4.50 on Ravelry (if you knit or crochet you should be a member of this site!)
how cute are they? they turn up at the toes!!  i think im going to make the back/heel come up a little higher...so its more of an ankle boot then a slip-on.  the pattern is simple and quick...i finished my pair in a couple of hours.  i think i know what a few people will be getting for xmas!!


Monday, June 27, 2011

weekend update

man this weekend was too short....right?
i had a baby shower cake to deliver to college station for a friend of mine Kim.
her shower was loosely themed after Shel Silverstein's children's books.  she told me her and the hubs really like his "Underwater Land" album so i decided to make the octopus from the album the main focus of the cake

isnt he cute....i cant get over how good he came out.  i kinda want to make one out of modeling clay and keep him on my desk.  the cake was my organic lemon cake with lemon curd and sweet cream filling....my fav flavor!
yesterday (sunday) i got sucked into watching the "My Big Fat Gypsy Wedding" marathon that was on TLC...anyone else find themselves glued to the tv? man...that show is cra-cra.
i was productive while i was watching though.  i started dying and making coffee filter roses for my wedding

what do you think?  i dyed them ivory, light green, and light orange....you cant really tell from the pic but it makes them look much more natural than stark white.  i love these roses...they look pretty real, elegant....and most important....cheap!!!  ill most more pics later.  last night was just a test run.  for more info on how to make them please visit Aunt Peaches tutorial on how to make these lovely blooms....this woman is seriously brilliant.
 
how was your weekend?

Tuesday, June 21, 2011

the weekend:in pictures

sorry its been a while since my last post but life got crazy last week....and with a plumbing emergency sunday and monday nothing else has gotten done.

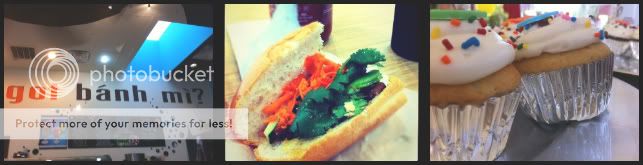
friday...atleast i think it was friday....dave and i went to China Town and got Bahn Mi subs for dinner.  i know....i know...Bahn Mi is Vietnamese but this restaurant, Grival, is in China Town.  Folks let me tell you they make the best Bahn Mi subs....ever!!! so so so yummy.  afterwards we went to the Asian Grocery Store and bought a big box of Hello Panada Cookies and some Green Tea ice cream.....omg so good.
saturday i had to deliver cupcakes to my friends son's 2nd bday party....we had lots of fun...but it was wicked crazy hot outside.
if you look at the temp on my rear-view you can see it says 106...106 people and probably 90% humidity.....good 'ole Texas summers. ick.  at one point during the day my temp read out actually said 108....yikes.
dave and I started a new cross-stitch project...a large Zelda alphabet and i started sewing together the hundreds of mini granny squares (each square equals 1 pixel - about 3" each) that will eventually make an afghan that looks like my pattern on the far right.....ive been working on this thing for probably a year now and im so ready to have it done. 
the pattern is based on this tile work....wicked is awesome btw.

ill be back later with a new NowPlaying:Tuesday.


Thursday, June 2, 2011

DIY: Free People inspired prayer flags/fun summer bunting

Ombre Prayer Flag Bunting
so this DIY is almost a full week late....or i guess you could look at it as a day early (since i usually do them on fridays)
pic from the Free People Blog
if you follow my blog regularly you know i have mentioned that i like the brand Free People....mainly just for the pretty pictures on their blog, but if i could afford their clothes i would wear them all the time.  i especially like their store design team....always something cool going up in their stores.  so today's DIY is an inspired tutorial on how to make their current
prayer flag-ish displays

i decided to use some spare cotton muslin fabric i had used as temporary curtains and do a dip-dye (ombre) technique on the fabric strips.  if you dont want to do any dying then you can cut up old clothes or t-shirts and skip ahead to the end.

1.) cut up your fabric...they dont have to be the same size.....just long enough to tie onto your clothes line and blow in the wind.  i cut my fabric approx. 1"x10" ....some strips were skinny and some were fat and definitely not cut in straight lines.  once they are cut soak them in warm water so your dye will bleed nicely

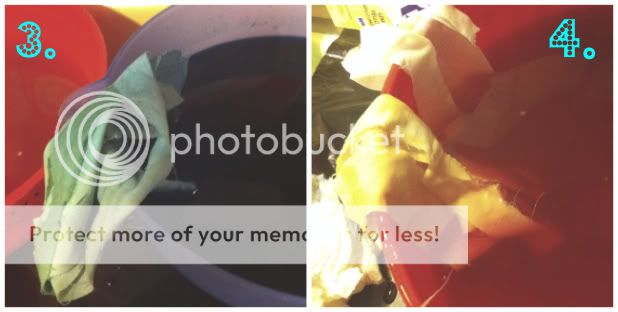
2.)  mix your dyes according to the package instructions.  i used the RIT powder dyes because it was cheaper and i was buying several colors.  i used some big popcorn/utility bowls added the powder and hot water (*notice the trash bag underneath the bowls....it kept my kitchen counter very clean!) wear your gloves or your hands will be colorful for days!!
3.) gather a group of fabric strips and fold the whole bunch in half. 
          >if you want the ends of the strips to be the darker part of the ombre effect - submerge them about halfway in the dye and let the rest (folded part) hang over the side of the bowl.  since they are wet they sort of cling and hold themselves in place, but if they fall in then fine....its not supposed to be super perfect.....imperfection is beautiful.  this is the basic ombre technique.
         >if you want a two-tone ombre effect - submerge the whole cluster of fabric strips in your lighter color (ex. green) and leave til you get your desired color saturation.  then submerge only the ends in the darker color (ex. blue).  since the fabric is wet the colors will blend nicely!

4.) mix it up!!  play with different colors and combinations.  make some lighter and some darker.  its your call....have fun with it
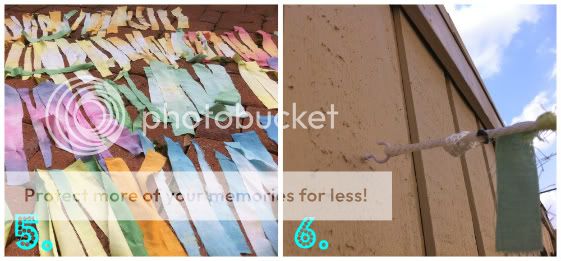
5.) once you have all of your fabric dyed and rinsed in cold water (to set the dye) hang your strips out to dry.  when i did this it was very hot (as always) so i just laid mine out on the brick of my patio...they were dry in under an hour.  Aren't those colors so pretty?  Now all you have to do is tie them on to your clothesline with a square knot....i spaced mine about 2in from each other. 

6.) put up some hooks with the screw threads on the end (i used a nail to make a pilot hole with).  at one end of your line tie a looped knot and hook it.  i zig-zaged my line across my patio......once i knew how long to make it i cut my line and tied another looped knot on the other end.  (tip: if you use an acrylic clothesline, like i did, you should burn the cut ends so that it won't unravel itself - for natural fiber rope use some hot glue on the ends so it won't unravel).

yes, i have knitta tagged my bike...i will finish one of these days
 isn't that fun? now if i want to have a patio party all i have to do is run some twinkle lights along my line for some great ambiance.  for more fun with ombre dying check out an awesome DIY on Hontestly WTF - they do an ombre dye job on some denim shorts or my favorite stylist Kris from Glitter 'n Glue .

dont forget to share your pics!! i wanna see what you create

Friday, May 13, 2011

Trend Spotting : Friendship Bracelets (repost - since Blogger deleted the first one)

Friendship Bracelets

ok....lets try this again (Thank you Blogger for deleting the original posting)
lately i have seen in several fashion blogs and magazines a new accessory trend going around....a fun blast from the past.....Friendship Bracelets.  you could easily sub in some metallic floss and do a black, white, and metallic scheme for a more "grown-up" sophisticated look.....maybe? i could just be reaching for an excuse to wear bracelets halfway up my arm again......i just sensed an eye roll from my mom...hehe


(source for all of the above)
(source)
now i dont know about you....but i loved making them back in the elementary days.  i had a floss box that i would carry around filled with every color of the rainbow, complete with a price list - printed out via my dot matrix printer, and i would make custom friendship bracelets and sell them for .50 cents.  even back then i had dreams of being a professional crafter....still haven't achieved that yet....but maybe one day. 

as you can see form the pics above.....the patterns have gotten more and more complex.  so if you are interested in picking this fun past-time back up here are some youtube video links that will help you out.
for more videos and how-tos look for "BeyondBracelets", "ChivonnesSecret" or "Hollistergirl1O1" - these are the 3 girls that ive gotten the most clear instructions from.  You can also go to http://www.friendship-bracelets.net/ for patterns
enjoy!