

finally....i had time to put together an original DIY.
this week i made a pretty flower halo. ive seen halo type headpieces in fashion/blogs a lot lately and i think they are so whimsical and fun....why not?
sure you might have to build up the courage the wear it out in public...but hey...who cares what someone else thinks....wear whatever makes you feel pretty.

supplies: ribbon, silk flowers, felt, scissors, glue gun and extra glue

Step 1. Pull your flower buds off their stems (they should just pop off) and seperate each level of petals from the "post". Note: if there are any plastic "shapers" (like the clear piece at the bottom left of #1) keep them you will need them
Step 2. Glue your you petals together (sans "post") with hot glue. be sure to glue your plastic "shapers" where they were originally (this will give you flower shape instead of being flat) - watch out for that hot glue...it hurts real bad!!

Step 3 and 4. Now you need to remove the post from your stamen area? You should be able to just push it out the top....you can see this in #4.

Step 5. Now that you have the "post" removed, glue the stamen part to the middle of your already glued together rose (from step 2). Now do a mock layout of how you want your flowers arranged so you know where to glue them
Step 6. Cut a strip of felt long enough to get the length you want (i did a partial halo, but you can make one that goes completely around your head). My strip was about 1.5 inches wide. I chose a tan felt because my hair is blonde and it would blend better. If you need to glue two strips together to get your length thats fine...i had to. Start gluing your leaves first and then your flowers. make sure that everything is secure.

Step 7. Finish gluing your flowers. My flower bundle had little tiny roses and some green bud things so i glued those around to fill in bare spots and add more texture and depth.
Step 8. Cut off your excess felt so that it doesnt show from the front. Since I did a partcial halo i cut two pieces of ribbon and glued one to each side of the felt so that the halo could be tied on. if you want a full halo carefully measure your felt so that it will wrap around your head comfortably and glue your ends together to form a floral ring of glory
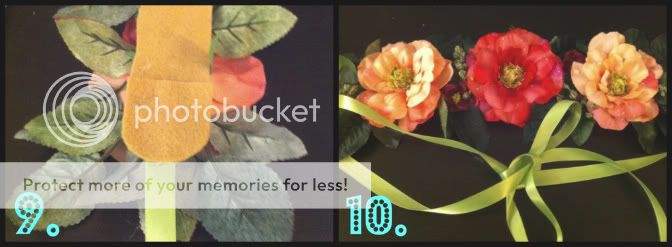
Step 9. I glued a little cover over where my ribbon was just to make it more neat looking...but you dont have to
Step 10. Stand back and look at the glourious halo you just made. Pat yourself on the back and have a celebratory drink of your choice. This is also where i tried it on and looked for places i needed to glue down leaves/petals to cover the felt.
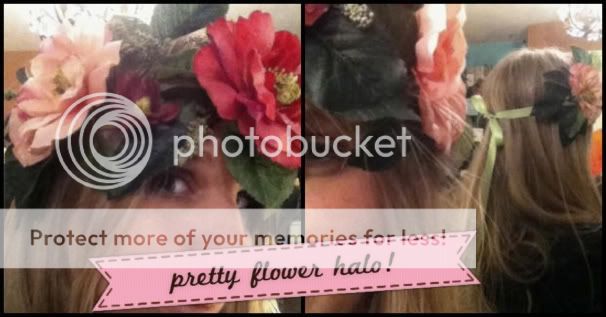
yay your done! you can see the front and the back (in the mirror). Hope you enjoyed this DIY
Please send me picks of yours i wanna see what y'all came up with.

No comments:
Post a Comment