Showing posts with label hair. Show all posts

Thursday, June 9, 2011

HairSpiration: the "no 'poo" movement....shampoo that is

"No 'Poo" - Has anyone heard of this?
(source)
  i saw this post on Re-Nest yesterday and had to pass it on.
(this directly from the Re-Nest site folks...i did not write this)

"Practitioners of the "no 'poo" movement point out that shampoo is designed to strip away all the natural chemicals in your hair and scalp, which are then artificially replenished by conditioner. Going shampoo-free helps your head restore its natural balance."
Here's how to do it:

1. Start with 1 tbsp of baking soda to 1 cup of water - the mixture should be cloudy, not gritty or pasty. Apply to the roots and work through the rest of your hair with your fingertips.

2. Condition with apple cider vinegar, with 1tbsp to 1 cup of water. You can also add a few drops of essential oils, some honey or a bit of lemon juice.

3. To get rid of build-up on the scalp, try a brown sugar scrub: 2 tbsp brown sugar mixed with conditioner or honey.

4. Rinse with water every week, and supplement by shaking in an absorbent powder like corn starch or rice flour, then brushing it out with a natural bristle brush.

5. If you need to refresh or deodorize your hair between washes, try a lavender mist. Add 5 drops of pure lavender essential oil to a half gallon of distilled water (or bring tap water to a boil, simmering for an hour). Spritz onto hair using a spray bottle.
 
after reading through the comments on the original Re-Nest post, most of the comments were positive! some mentioned that if you have oily hair that you might, during the beginning/transition stage, have itchy flaky scalp.  If you stick with it those problems will go away.  my hair is pretty dry and only requires a good washing about 2 times a week.  so i may give this a try.  for the past 6+ months i have been using a sulfate free shampoo and love it....my hair has been slower to get oily since using it.....but its so dang expensive.  maybe this is the solution for cheap, clean and healthy hair? 
your thoughts?

Monday, April 25, 2011

happy hair....finally

i finally got a haircut this weekend!! why is that such a big deal? well....i have really long hair and i usually try and get a trim every 3 months just to keep the ends healthy and not dried out and ugly.  but with being busy and broke....its been about 6 months.....and my hair was looking bad!  i take good care of my hair.....use a sulfate-free shampoo, only blow dry once a week, limit how much its washed (2x a week only), use Moroccan Oil daily, and limit the amount i use heat tools.  the fact of the matter is....no matter how well you take care of your hair.....you need to get it trimmed regularly! So after 2 inches (which should have been 3 to 4in) and the BIG bottle of Moroccan Oil (my treat to myself).....my hair is happy.....not dry....not crunchy....but shiny and healthy.

if you havent tried Morocan Oil for your hair.....do it.  its a kinda pricey but its worth it. (dont use the knock-offs!!)


Monday, April 4, 2011

fishtail braid video - from Free People

have i mentioned how much i like Free People?  i love most of their clothing - even though i would never be able to afford it - and their blog is always full of fun pics, tutorials, and inspiration.  here in houston its heating up and if you have long thick hair like me you know that it can feel like you have an easy bake oven on your head.  so once again i am posting one of their hair tutorials!!


one cool thing that they did...maybe for their fall catolog shoot?.....they clipped in different color hair extentions and then did a fishtail braid.
source

  what a fun way to add a pop of color and texture to your hair.....plus its out of your way and cute.  enjoy!


Thursday, March 31, 2011

Moroccan Oil vs. Sally's Faux Moroccan Oil

this past weekend i stoped by Sally's to pick up some dry shampoo and i noticed that they carry an Off-brand Moroccan Oil.  Since I was just about to run out of my REAL Moroccan Oil i decieded to by their little sample bottle and give it a try (the one on the right - $2).  the first time i used it i only used a small amount - just in case....and everything seem fine....not much different from the real thing.  I was kind of excited....wow i can buy this off-brand for a half the price of the real-deal and its just as good!
WRONG
i used it for the second time this morning and used the same amount i would have used of the REAL Moroccan Oil.  Lets just say i my hair looked better before i washed it than it did after i washed and put this crap in it.  it was so greasy and oilly that i couldnt tell if my hair was wet or dry unless i touched it.  GROSSS!!  i had to empty half a bottle of dry shampoo in it just so i would look presentable enough to go to work.....so mad. so dont use this...spend the extra money for the real Moroccan Oil - your hair will thank you.

Now....that being said...there is another Argan Oil product put out by this "Proclaim" Brand that i will recommend....but not for your hair
its a spray oil for your body and hair. I think i paid $7 for it and its a pretty good sized bottle.  just some background info for ya - my body does not like lotion.  what do i mean by that? my body rejects lotion - for exaple, 10 min after i put lotion on... my legs/arms push it back out.  i know....i know...that sounds really weird and unlikely...but its true. i can put lotion on, rub it in, and in around 10 min or so i have lotion once again sitting on top of my skin getting all over my clothes and whatever is around me.  so neadless to say...i never use lotion.  i have in the past used sesame oil instead of lotion but i dont like the smell and its toooo oilly. 
so i bought this "Natural 7 Oil".  i dont recommend it for your hair...but i do for your skin.  i use it right after the shower...a little goes a long way so dont go crazy with it.....even if you do it will eventually soak in.  it makes my legs and arms really soft - no more sandpaper elbows!!  and big plus it doesnt leave a weird oilly/greasy/sticky residue....once its soaked in it just leaves your skin soft.  HORRAY!!!

thats all for now about beauty products ranting.  im going to try to put together a post about my favorite summer make-up and beauty products - on the cheap! stay tuned


Thursday, October 14, 2010

free people hair trick

I saw this on the Free People Blog and thought it I would pass it on.  

the relaxed wavy look

first, slightly dampen hair with a styling spray – she uses bumble and bumble (but im sure any flex hold hairspray, spray gel, sea salt spray will do the trick).

next, separate the hair into two pieces down the center. then separate those two into two. start with 2 strands, either the left side or the right of head, and twist the hair away from the face. then take the 2 twisted strands and twist them together. secure on top of head with a hair clip.

once the product has had time to dry, remove the clips and shake your hair out girl.

i have naturally wavy/curly hair that does this whether i want it to or not....but for those who dont i hope this helps you.
xoxo
-erin-

Friday, July 16, 2010

friday DIY: feather hair strings

i thought it would be fun to start a regular weekly DIY project...this week it lands on friday. we'll see how long i can keep this up.

in college i had some feathered earrings that i wore alot. they had these long feathers that peaked out from underneath my hair...i loved them. i have always been in love with the hippie/boho/natural styles...my mom used to tell me i was born in the wrong generation. so after looking through some favorite blogs i stumbled upon a tutorial on Elsie's blog and some other feather hair accessories on MuchoMuchBuenoBueno (which coincidentally is a good friend of my friend Sara Van Buskirk-small world huh). so being inspired i decided to make some "feather hair strings"...thats what i call them anyway.

so here we go....DIY Feather Hair Strings:

What you will need (from left to right): 1.) hot glue gun 2.)twine, leather cord, suede straps(on far right of pic) 3.) assortment of feathers (colored or patterned) 4.) hair clip (the one in the pic is used to sew hair extensions to, but you can use any kind that works well with your hair) 5.) beads (i used wooden beads...make sure the bead hole is big enough for your twine/leather cord)

im a big fan of using stuff you have laying around the house...but if you do need to buy supplies your in luck. everything all together was $10 or less and can make several dozen of these things....or something else fun.


Step 1: measure and cut a piece of twine/leather cord/suede straps. i held my string at the part in my hair and measured how long i wanted it. If you want two strands, double the length of your string and add 2 inches(to allow for the loop/knot). Fold your string in half (or almost half - i wanted mine different lengths) and tie a knot about an inch down - this will leave a loop at the top

Step 2: string on your beads in reverse order (the first bead you string on will be the bead on top once your done)


Step 3: pick out 2 or three feathers and glue them together. i just put a small line of hot glue on the top of each feather until i was happy with the number and arrangement of the feathers. if you dont like it no worries...they come apart pretty easily...just pull apart and re-glue til you are happy.

Step 4: on the back side of the feather cluster put a small line of glue and attached the end of one of your Hair Strings. I glued about an inch of string onto the feather cluster.


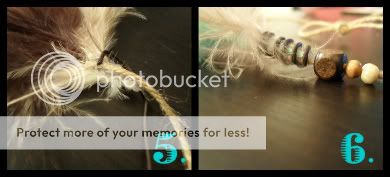
Step 5: put a small dot of glue at the base of the string/feather cluster and attach the end of your small leather cord. allow to dry before you glue and wrap

Step 6: once the end of the cord is dry and secure put a small line of glue all the way up the rest of the feather/string joint. quickly wrap leather cord around....the glue will hold the leather wrap in place.


Step 7: when everything is dry and set arrange your beads wherever you want them. Repeat steps 1-6 if you are doing a double Hair String.

Step 8: clip into hair and enjoy! (i used a snap clip - slipped the loop onto the clip and clipped it into my hair). You can also glue the Hair String to a "weft" clip (shown in supply pic)...whatever you prefer.


These Feather Hair Strings are cute for summer outfits and make great gifts. Hope you enjoyed today's DIY. If you have questions let me know!

xo
-e